


I thought in this post I would show some photos of the progress, albeit slow, that We have made over the last 18 months in trying to turn a bare piece of weed-strewn field into a traditional potager garden.
When we started the field was dense with buttercup and wild grasses, running up to a neighbouring tennis court which had badly rotten netting and a rotten ashfelt surface...

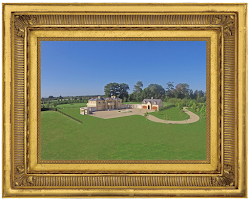
Above: A view along the back border of the potager when it was just a paddock, as it was being marked out and measured.
Below: The same view today. Our neighbours have put in a smart new tennis court with new ashfelt and very spiffing black netting. The Fejoa hedge has gone from 6" tall to almost 3' tall and bushed out quite a bit. It shall form a silvery backdrop to the purple and blue border. Forgive the rainy, muddy winter view - I look forward to sharing the blooming, colourful summer view in Potager Progress Part Two, in a few months. You can see some of the roses waiting to be planted when it dries out a bit, and also more polythene matting waiting to be covered with limestone chip.
Below: The same view today. Our neighbours have put in a smart new tennis court with new ashfelt and very spiffing black netting. The Fejoa hedge has gone from 6" tall to almost 3' tall and bushed out quite a bit. It shall form a silvery backdrop to the purple and blue border. Forgive the rainy, muddy winter view - I look forward to sharing the blooming, colourful summer view in Potager Progress Part Two, in a few months. You can see some of the roses waiting to be planted when it dries out a bit, and also more polythene matting waiting to be covered with limestone chip.

Before we made any of the beds, the first thing we did was plant the boundary with a dense Hornbeam hedge. You can see the hedge below, seemingly running down the middle of a paddock.
 Above: The Hornbeam hedge 1 year after planting, and newly re-mulched.
Below: The same hedge 6 months later, with new growth and newly created garden beds.

This is probably a good time to introduce our garden angel, emanuensis extraordinaire and general factotem, Jackie (below). Jackie has helped so much with the gardening at Willowbrook. She is currently recovering from a broken hand - get well soon!

Then we constructed the raised beds and carefully placed them in situ according to our plan (at very top of the post).
 Above: The newly created potager beds put in place
Below: The same beds filled with soil and some temporary planting. You can also see the temporary runner duck coop, no longer required now they have a good sense of 'home'. The space in the middle where all the timber is, is where we are going to build the potting shed (another job to get around to!).

Below: The Polythene paths being laid down, over which the lime chip shall be leveled. At this stage there was still a lot of grass around. We have since sprayed that off. We shall re-sow the feature lawns with a good compact lawn seed, rather than the wild grass.

 Above: A view of one of the newly placed pots in a bed
Once the border has been planted this spring, and the ground work is completed, we shall continue embellishing with further architectural features, the first one being blue painted obelisks...
Obelisks...


Obelisks are a fairly traditional, geometric feature, and are a part of so many garden designs.

They can really make a statement, as in these last two photos, and I hope we can achieve this in our little garden.


It has been slow progress, but we have done all the work ourselves in our 'spare time', which does give one a sense of pride! Stay tuned for our next post when we will bring you part nine of "The Great Country Estates of Britain Series".


..jpg)


I LOVE THE WAY YOU ARE WORKING TO LIVE YOUR DREAM! I ENJOY FOLLOWING YOUR BLOG.ITS GOING TO BE A WONDERFUL PLACE.
ReplyDeleteI am looking at what a feat you have accomplished. Amazing. You
ReplyDeletemust be so tired. It is so gratifying isn't it. God Bless you.
You have an eye for beauty.
yvonne
It is going to look amazing. What a fabulous job you have done. Thrilled to find and follow your blog!!
ReplyDeleteIt's wonderful, even in it's infancy, how clever you all are & how jealous am I!
ReplyDeleteMillie x
What a wonder opportunity you have offered those of us who aspire to a lovely garden. Being able to see the way you designed and laid out the beds and hedges is inspirational.
ReplyDeleteI have 58 mostly vertical acres upon which I am currently building a house that has a meadow in front of it containing a small apple orchard which I started 3 years ago My hope is to add some oversized stone retaining walls and perhaps a row of blackberries and one of grapes. I love to see things grow even though I have essentially 58 acres of mature forest.
Please do keep us updated with pictures of the progress of your own spectacular garden. Ann
Thank you all for your lovely comments.
ReplyDeleteAnn - I would definitely suggest you get one of the newer, thornless blackberry bushes for your garden (they are so much easier to harvest and maintain than the old prickly ones.
David.